FIELD NOTE
Meet Cup Wrap Lab: from three measurements to a better paper fit
A practical first project with Cup Wrap Lab: measure a tapered cup, generate a blank SVG or PDF, check print scale, and test the wrap before sublimation.
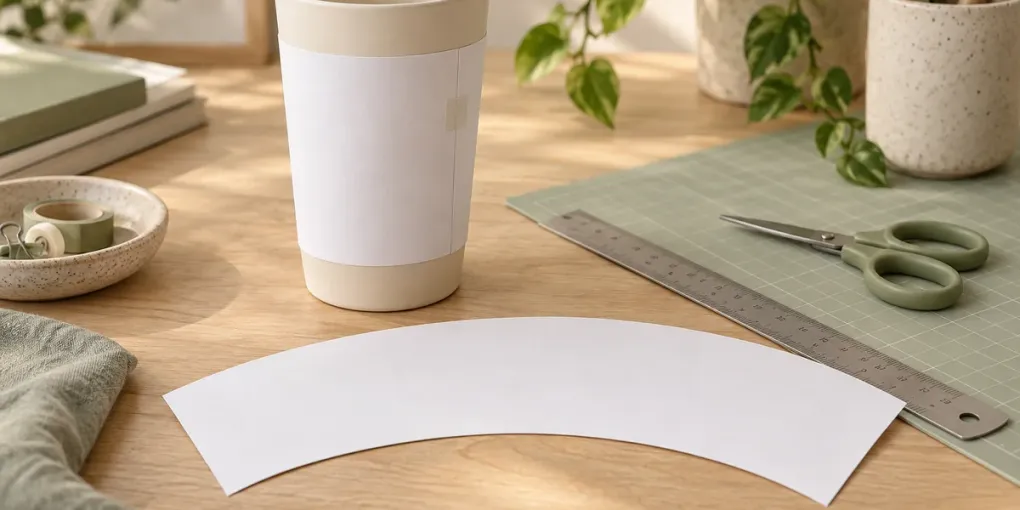
A cup can say “20 oz” on the box and still have a different shape from the last one you bought. The difference matters when a downloaded wrap fits at the top but leaves a gap at the bottom. Cup Wrap Lab starts with the cup on your desk: you measure its printable region, generate a blank outline, and check it with ordinary paper.
The tapered tumbler template generator is free and works in your browser. It exports SVG outlines and printable PDF files. It does not edit photos, bend rectangular artwork or prescribe heat-press settings. Its job is the small but essential step before that: helping you establish a usable wrap shape.
Start with the printable region
Mark a top and bottom boundary on one straight-sided part of the cup. Keep clear of the rolled lip, shoulder and rounded base. Measure the outside diameter at each boundary with calipers, or measure the circumference with a soft, non-stretch tape. In the tool, select the method you actually used.
Then measure the height between your boundaries. “Vertical” means straight up and down; “along the sidewall” follows the slope. The tool accepts both. See the complete measuring guide if those two heights are easy to confuse.
Our starting example uses a 90 mm top diameter, a 70 mm bottom diameter and a 180 mm vertical height. That produces a sidewall height of about 180.28 mm. The example demonstrates the controls; it is not a supplier-approved or physically verified cup model. Replace the numbers with your own.
Why the outline curves
A straight cylinder unfolds into a rectangle. A tapered cup with a circular cross-section and straight sidewalls unfolds into a section of a ring. Its top and bottom edges are arcs of different lengths. Connecting two circumference measurements with straight lines to make a trapezoid would not give the same shape.
Cup Wrap Lab also keeps the orientation when the bottom is wider than the top. A very slight taper stays curved rather than being rounded into a cylinder. Cups with bulges, steps or multiple slopes need a different model or a smaller printable region.
Choose margins deliberately
Use the coverage setting to wrap the full circumference or to leave a region open beside a handle. Coverage does not create a handle-shaped cutout.
Three settings serve different jobs:
- Seam overlap or gap: extra or missing length around the cup, measured at the top boundary. The corresponding bottom amount changes with the taper. You can choose one treatment at a time.
- Artwork bleed: space outside the final cut line, for extending artwork beyond the edge. It is not extra cup coverage.
- Safe inset: a guide inside the cut line, for keeping important text and details away from edges.
For the first fit check, start with an edge-to-edge seam. Diagnose the basic geometry before adding production allowances.
Print one inexpensive proof
Choose the cut-only SVG if you need a clean path for design software. Choose the reference SVG for the orientation labels, guides and calibration ruler. When importing either, verify its physical dimensions in your editor.
For an ordinary printer, choose the A4 or US Letter PDF. Larger outlines are tiled into numbered rows and columns with an 8 mm paper overlap. Print at 100% or Actual size, and disable automatic fitting or shrinking. Measure the 50 mm calibration line between its endpoint ticks on every sheet. A ruler that prints as 48 mm is evidence of a scale problem, not a reason to alter your cup measurements.
Trim the page borders as needed and align repeated crosses before taping the pages together. Then cut along the solid outline. The actual-size printing guide explains the file choices and page assembly.
Let the cup tell you what to adjust
Wrap the paper without pulling. Check the upper edge, lower edge and seam separately. If every dimension is wrong, revisit print scale and units. If one edge fits and the other does not, remeasure those boundaries. If the paper wrinkles despite correct dimensions, look for a curve or changing slope in the cup wall.
Use the fit troubleshooting guide to change one setting at a time. Tiled paper proves the outline; it does not guarantee an invisible join when transferring artwork across multiple sublimation sheets.
Once the paper fits, save the measurements on your device or export a measurements file. Note your cup supplier, model and measurement date alongside it. A successful fit on your own cup is more useful than a capacity label alone.
Make your first blank wrap, then bring your artwork and your supplier’s production instructions to the next step.
The accompanying image is an AI-generated illustration, not a photo documenting a measured fit test.